Your text will be centered on the name plate and the first line will be a bit larger than the others.
Even though some of the fonts look like they will be smaller than others, I make sure that all available space on the name plate is filled no matter which font you use. It’s just difficult to program the computer to show that.
I ordered many name plates and was so often disappointed that the engraving was all smushed into the center with most of the name plate blank, or the engraving was barely surface scratched. I finally gave up and decided to make my own. A 30w Fiber Laser Engraver ensures that you will receive a deep and crisp engraving. Your order will be individually designed with care and thought and will NOT be pasted into a predesigned template.
The totally perfect Name Plate!
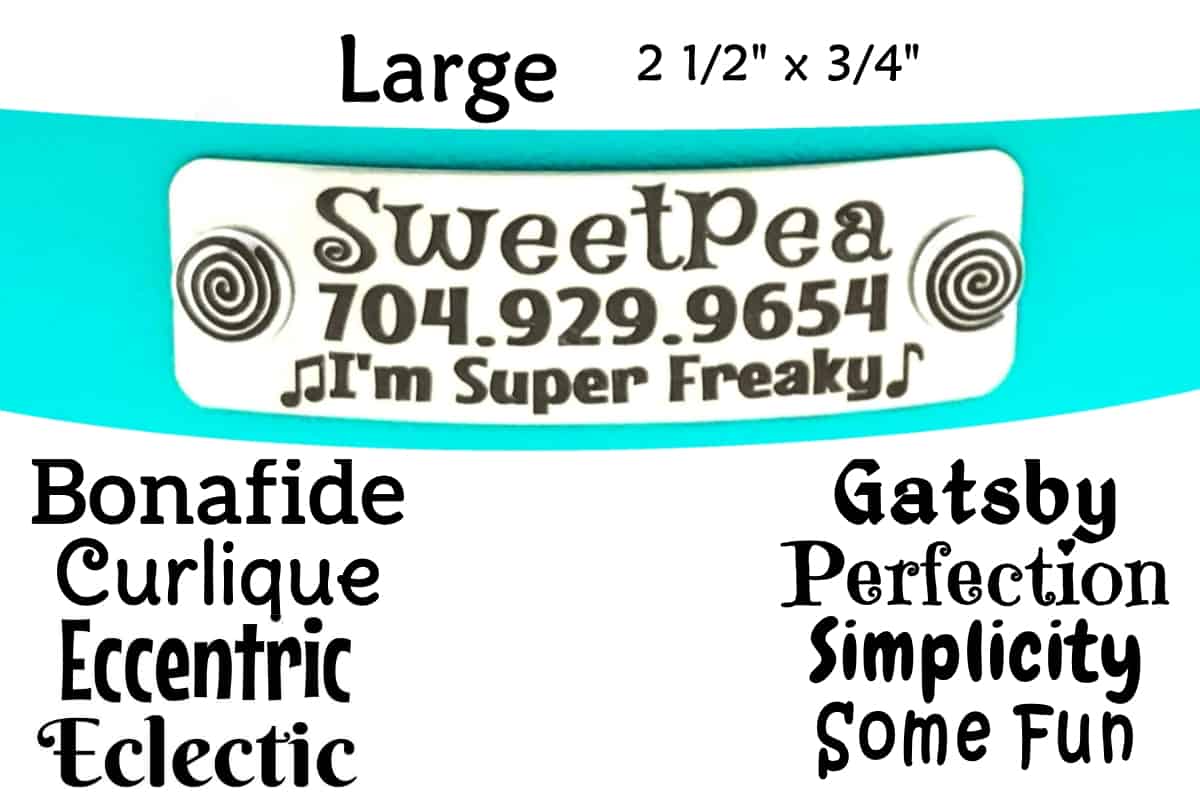
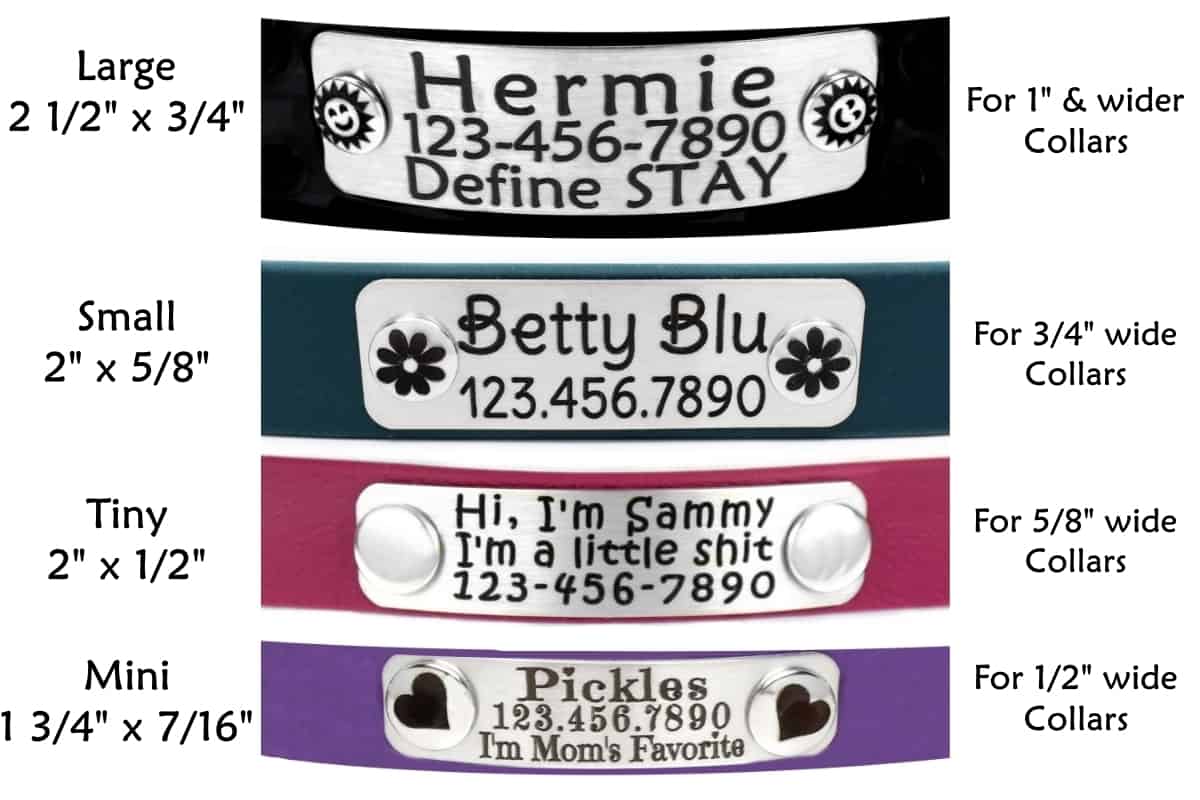
Contoured to hug your dog’s neck. Just thick enough not to bend but not so thick that it’s heavy. 2 1/2′ wide and 3/4″ high.
This Name Plate is designed to accommodate from one to four lines of text. Each line has a maximum of 20 characters (letters/numbers/spaces).
Why you might ask?
More than 20 characters makes the text small and vert difficult to read. The less characters, the larger each one can be and thus easier to read.
Why do we insist on Stainless Steel?
Stronger and Harder than Brass
Does not Tarnish
Doesn’t bend or dent like Aluminum
Doesn’t chip like lacquered or enameled Name Plates.
Unlike plated Metals, there is no worry about wearing down to the base metal over time.
How to attach the Name Plate to your Collar
If you’re handy, installing the Name Plate is simple.
If you’re a klutz…ooops, pardon me. If you’re more brainy than brawny, you may need to ask someone more tool savvy for help.
No worries about “right side up” or “upside down” because both sides of the rivet have lovely round caps.
Place the nameplate on the collar where you want to attach it..
Please remember…(don’t chuckle, just enjoy learning from my mistakes)
1. If your collar has a regular buckle on one end and holes on the other end, leave space at the end of the holes so there is room for the buckle when the collar is fastened.
2. If your collar has an adjustable slide leave space so the slide has room to, well, to slide.
Once you’ve placed the Name Plate, use a pen or pencil to mark through the two Name Plate holes onto your collar strap. It looks best when centered widthwise, not closer to one edge.
Easiest ways to make a hole:
1. Biothane and Leather – Drill ( 1/8″ or 3/16″ bit) or Leather Punch (1/8″ or 3/16″)
2. Nylon – Soldering Iron or Leather Punch (1/8″) – If you use a punch, it’s best to CAREFULLY melt the hole edges so they don’t fray. Many use a round nail to make the hole and to melt the hole edges. They heat the pointy side of the nail CAREFULLY on their stove burner. Lawsuit fears keeps me from suggesting you do this but it does work well. 🙂
With the nail method, an oven mitt or pliers to hold the nail will avoid toasted fingertips.
AHEM: If the holes are too large, the rivets will slip right through them. Your Name Plate will (duh) fall off.
Push a rivet stem through one hole from the bottom side of the collar. Then place your Name Plate’s hole over that rivet stem. Next press a rivet cap over the stem. Press again firmly, making sure top and bottom are aligned, straight up and down and not crooked.
With a solid stationary surface (rubber mats or wood blocks work well) tap the rivet head to “set”. The shaft will spread nicely into the cap if you have them aligned and not crooked.
Use a mallet (rubber and rawhide are perfect) A metal hammer works but might leave an unattractive dent or crease.
Repeat for the hole on other side of the Name Plate.
If you are not handy and don’t have anyone to help, you might be happier with a different name plate.
Should you have any questions or requests, please don’t hesitate to send me a message. Thank you very much for visiting! Kitt

